
This Tutorial was written in psp9 and Animation shop.
Supplies used in this Tutorial
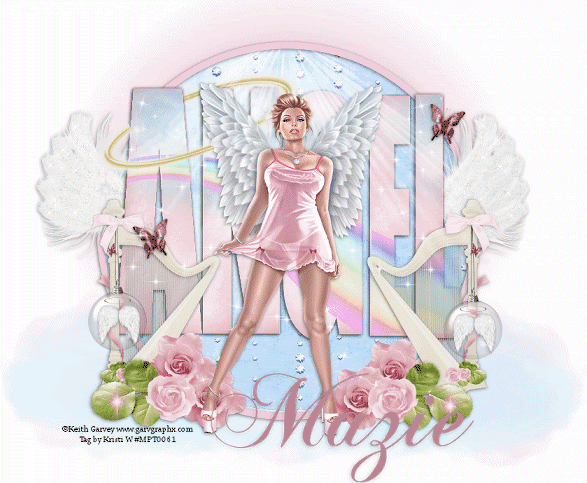
Tube is the art of Keith Garvey which you can get his art here.
Scrap Kit is Angel Kisses by me which you can get here.
Template is #4 Created by me which you can get right here on the blog.
Other supplies Cloud animation which I found on the net you can get here.
Let's get started
Open up your template and elements of choice.
Click on the outline circle of your Template and go to edit select all float-defloat.
Add a new raster layer and flood fill this with a paper or color of your choice.
Remove the outline layer of the template.
Next click on your middle circle layer edit select all float-defloat.
Add a new raster layer of choice and flood fill this with a paper or color of your choice. Remove the middle circle layer.
Open up your wings and place them in place of the template and remove the template wings. Add a shadow of choice.
Next click on your top halo layer selections-select all float-defloat. Add a new layer flood fill this with a gradient of choice.
Do the same step for your bottom Halo and remove the Halo templates.
Add all your other elements where you desire on your tag.
Adding a shadow to each element.
Place your tube where desired.
Add your text and copyright on your tag.
Now onto the animation part of the tag.
On the word art layer go to edit select all float defloat. Add a new raster layer of choice and flood fill with a color or paper of your choice.
Open the cloud psp file. you will see that there is 27 frames(layers) there. Close all the layers except for layer one. Make sure you are clicked on that layer.
Find the cloud pattern in your pattern folder. Click onto the canvas that says angel. new layer. Label each of your layers as cloud 1,Cloud 2 ect.
Do no worry about any excess cloud now. We will take care of this after.
Now click back to the cloud layers. Hide layer 1. Unhide layer 2. Click on it. Locate it inside patterns now the layer 2. it will say something like clouds.
The one that says current pattern is the old one so click cloud to activate the new one. Click back to the canvas and add a new layer called 2. Fill this layer with the clouds. Repeat this process until you have added all 27 different layers of cloud.It will be a lot of layers but it is easily worked with.
Hide all the cloud layers except for layer 1. Click on the word angel layer. Selections all float defloat. Selections invert. Click on layer one and hit delete once. You will notice the clouds are just in the letters now. do not deselect. One a at a time un-hide each cloud layer hitting delete once. At the last layer selections none. Re-hide all cloud layers except for layer 1.
Click on the angel layer. Duplicate and hide the duplicate. Click on angle layer and merge visible.
The cloud layer 1 and angel 1 are now merged together.
You are going to do this 26 more times for the 27 cloud layers in total.
Always remeber to duplicate the angel layer and hide it so you can merge it with the cloud layer. At the end you will be left with 27 layers. Hide all layers but the bottom one. I renamed these layers clouds 1 etc because at the end you have to merge all layers into these layers and you will be left with 27 total.
Continue to build your tag as you want. Merge all layers together. When done leave all layers opened. Save as a psp file. Open ani shop. Open file you just made and hit play. If satisified save as a gif and you're done.
If you should have any questions please feel free to email me
I hope you enjoyed this Tutorial
Supplies used in this Tutorial
Tube is the art of Keith Garvey which you can get his art here.
Scrap Kit is Angel Kisses by me which you can get here.
Template is #4 Created by me which you can get right here on the blog.
Other supplies Cloud animation which I found on the net you can get here.
Let's get started
Open up your template and elements of choice.
Click on the outline circle of your Template and go to edit select all float-defloat.
Add a new raster layer and flood fill this with a paper or color of your choice.
Remove the outline layer of the template.
Next click on your middle circle layer edit select all float-defloat.
Add a new raster layer of choice and flood fill this with a paper or color of your choice. Remove the middle circle layer.
Open up your wings and place them in place of the template and remove the template wings. Add a shadow of choice.
Next click on your top halo layer selections-select all float-defloat. Add a new layer flood fill this with a gradient of choice.
Do the same step for your bottom Halo and remove the Halo templates.
Add all your other elements where you desire on your tag.
Adding a shadow to each element.
Place your tube where desired.
Add your text and copyright on your tag.
Now onto the animation part of the tag.
On the word art layer go to edit select all float defloat. Add a new raster layer of choice and flood fill with a color or paper of your choice.
Open the cloud psp file. you will see that there is 27 frames(layers) there. Close all the layers except for layer one. Make sure you are clicked on that layer.
Find the cloud pattern in your pattern folder. Click onto the canvas that says angel. new layer. Label each of your layers as cloud 1,Cloud 2 ect.
Do no worry about any excess cloud now. We will take care of this after.
Now click back to the cloud layers. Hide layer 1. Unhide layer 2. Click on it. Locate it inside patterns now the layer 2. it will say something like clouds.
The one that says current pattern is the old one so click cloud to activate the new one. Click back to the canvas and add a new layer called 2. Fill this layer with the clouds. Repeat this process until you have added all 27 different layers of cloud.It will be a lot of layers but it is easily worked with.
Hide all the cloud layers except for layer 1. Click on the word angel layer. Selections all float defloat. Selections invert. Click on layer one and hit delete once. You will notice the clouds are just in the letters now. do not deselect. One a at a time un-hide each cloud layer hitting delete once. At the last layer selections none. Re-hide all cloud layers except for layer 1.
Click on the angel layer. Duplicate and hide the duplicate. Click on angle layer and merge visible.
The cloud layer 1 and angel 1 are now merged together.
You are going to do this 26 more times for the 27 cloud layers in total.
Always remeber to duplicate the angel layer and hide it so you can merge it with the cloud layer. At the end you will be left with 27 layers. Hide all layers but the bottom one. I renamed these layers clouds 1 etc because at the end you have to merge all layers into these layers and you will be left with 27 total.
Continue to build your tag as you want. Merge all layers together. When done leave all layers opened. Save as a psp file. Open ani shop. Open file you just made and hit play. If satisified save as a gif and you're done.
If you should have any questions please feel free to email me
I hope you enjoyed this Tutorial


No comments:
Post a Comment